How to create a search engine
 I am going to teach you how we can create a search engine using Google API.
You can add more styles to it ,because I'd be creating a simple looking search engine.
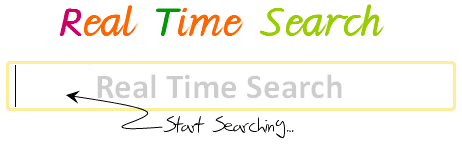
Google Custom Search API are wonderful tools to create some awesome search engine like tools. Also if you want to add a search option to your website and customize the look and feel of your search results, Google Custom Search API serve best to you. I have created a Real Time Search engine (I call it real time as it search as you type). I am really impressed by the speed/response of Google Search API.
In order to use Google Search API, you have to first generate a Key for you. Go to following page and signup your self for the Key. Sign up for Google API Key

https://code.google.com/apis/ajaxsearch/signup.htmlNext step is to include the Google Search API javascript. Don’t forget to mention your key in the below code.
<script src="http://www.google.com/jsapi?key=YOURKEY" type="text/javascript"></script> <script type="text/javascript">

google.load('search', '1'); </script>
Now We will create a textbox and a button that will take input for search. And a DIV that will be populated by results
<input type="text" title="Real Time Search" name="searchbox"/>

<input type="button" id="searchbtn" value="Search" onclick="search(searchbox.value)"/>
<div class="data" id="web-content">
</div>
When user will write a query and push Search button, a request will be made to Google Search using Custom Search API and the results are fetched. These results are then copied into the DIV.
We will use following JavaScript to call the Google Search API and copy the results in our container DIV. The code in plain english is:
1. Create an object to connect Google Web search using class google.search.WebSearch.
2. Set a callback function that will get call once the results for the search are fetched.
3. Call the execute() method with search query as argument.
4. In callback function, iterate through the results and copy it to container DIV.
var webSearch;
webSearch = new
google.search.WebSearch();
webSearch.setSearchCompleteCallback(this, webSearchComplete, [webSearch]);
function webSearchComplete (searcher, searchNum)
{
 var contentDiv = document.getElementById('web-content');
 contentDiv.innerHTML = '';
 var results = searcher.results;
 var newResultsDiv = document.createElement('div');
 newResultsDiv.id = 'web-content';
 for (var i = 0; i < results.length;
 i++)
 {
 var result = results[i];
 var resultHTML = '<div>';
 resultHTML += '<a href="' + result.unescapedUrl + '" target="_blank"><b>' +
 result.titleNoFormatting + '</b></a>br<br/>' +
 result.content + '<div/>';
 newResultsDiv.innerHTML += resultHTML;
 }

 contentDiv.appendChild(newResultsDiv); }
 function search(query)
 {

 webSearch.execute(query);
 }
You could see it was really simple,easy and short,however it works perfectly but you notice it has poor styling.You can add it up ,or download the sass styles. created from Trednix.com/drexisrael
You can even collect cookies from the people using your search engine ,learn How to create session cookies and All you need to know about cookies.How about adding a cool ,nice and dynamic dark mode to it , see it here How to create the best dark mode that works for all the pages in your site and does not turn off when page reloaded

Comments
Post a Comment