How to build SMS otp for verification in php
Today ,i am going to teach you something you cannot find easily on the web,which is sms otp. you can also learn email otp.You see that screenshot above? that's exactly what we are building,cool isn't it ?OTP is an effective way of validating users. This type of validation is widely followed by the banking applications, e-commerce software, and many more verticals. In this tutorial, we are going to see how to implement OTP SMS mobile number verification using PHP,isn't that fun?!
There are various APIs available in the market for sending SMS via an application. In this code, I have used the Textlocal API for sending OTP SMS. Textlocal is one of the popular SMS services. It provides the SMS service for many programming languages. Download the API PHP class to integrate it into our application platform.
For verifying a mobile number by sending OTP SMS with the use of Textlocal API, we need to create a Textlocal account and login with to get the API key. This API key is used later while instantiating the API class for sending SMS.
In this example, we use two HTML forms. One is for getting the mobile number and the other is for getting the OTP. By submitting these forms, the AJAX request will be sent to access PHP to send OTP code and to validate it with PHP session data.
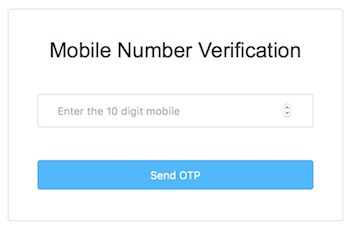
Getting the Mobile Number to Send OTP
This is the landing page that will show a HTML form for getting user’s mobile number to be verified. On submitting the mobile number by clicking the send OTP button, an AJAX code will be executed to request PHP for sending OTP via SMS using the Textlocal API.</DOCTYPE html> <html> <head> <title>How to Implement OTP SMS Mobile Verification in PHP with TextLocal</title> <link href="style.css" type="text/css" rel="stylesheet" /> </head <body> <dv class="container"> <div class="error"></div> <form id="frm-mobile-verification"> <div class="form-heading">Mobile Number Verification</div>
<div class="form-row">
<input type="number" id="mobile" class="form-input" placeholder="Enter the 10 digit mobile">
</div>
<input type="button" class="btnSubmit" value="Send OTP" onClick="sendOTP();">
</form>
</div>
<script
src="jquery-3.2.1.min.js" type="text/javascript">
</script> <script
src="verification.js">
</script>
</body>
</html>
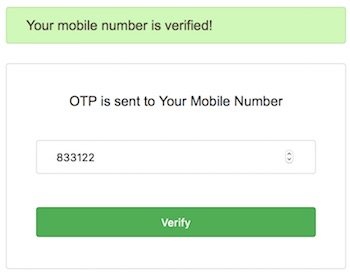
HTML form to Submit OTP for Verification
This is another HTML form that will be loaded by AJAX after sending the OTP to the user’s mobile number. The user has to submit the received OTP via this form. The generated OTP code is stored in a PHP session variable.This session data will be used for verifying the entered OTP is correct or not.
<div class="error"></div> <div class="success"></div> <form id="frm-mobile-verification"> <div class="form-row">
jQuery AJAX Script for requesting OTP Sending and Verification code
This is the JavaScript file containing the functions for requesting OTP Sending and Verification PHP code via AJAX. Both of these functions sends the appropriate action parameter to execute suitable PHP code block. The sendOTP() method sends the mobile number and send_otp action params to the PHP file. Similarly, the verifyOTP() method sends the OTP code entered by the user with corresponding action parameter.
function sendOTP() { 	$(".error").html("").hide();
var number = $("#mobile").val();
if (number.length == 10 && number != null)
{
	var input = { 			"mobile_number" : number, 			"action" : "send_otp" 		};
 		$.ajax({ 			url : 'controller.php', 			type : 'POST', 			data : input, 			success : function(response) { 				$(".container").html(response);
 			}
 		});
 	}
{
		$(".error").html('Please enter a valid number!') 		$(".error").show();
	}
}
 function verifyOTP()
 {
	$(".error").html("").hide();
	$(".success").html("").hide();
 	var otp = $("#mobileOtp").val();
 	var input = { 		"otp" : otp, 		"action" : "verify_otp" 	};
 	if (otp.length == 6 && otp != null) { 		$.ajax({ 			url : 'controller.php', 			type : 'POST', 			dataType : "json", 			data : input, 			success : function(response) { 				$("." + response.type).html(response.message) 				$("." + response.type).show();
		},
		error : function() { 				alert("ss");
		}
		});
 	}
else
 {
		$(".error").html('You have entered wrong OTP.') 		$(".error").show(); 	} }
Controller.php
This is the PHP Controller class which is accessed via AJAX. The class constructor invokes the function for handling mobile verification actions based on the request sent via the AJAX call. This function processes sending OTP to a target mobile and validating OTP entered by the user.
<?php
session_start();
error_reporting(E_ALL & ~ E_NOTICE);
require ('textlocal.class.php');
class Controller
{
function __construct() {
$this->processMobileVerification();
}
{
switch ($_POST["action"]) {
case "send_otp":
$mobile_number = $_POST['mobile_number'];
$apiKey = urlencode('YOUR_API_KEY');
$Textlocal = new Textlocal(false, false, $apiKey);
$numbers = array( $mobile_number );
$sender = 'EVLEARNER';
$otp = rand(100000, 999999);
$_SESSION['session_otp'] = $otp;
$message = "Your One Time Password is " . $otp;
try{ $response = $Textlocal->sendSms($numbers, $message, $sender);
require_once ("verification-form.php");
exit();
}
catch(Exception $e)
{
die('Error: '.$e->getMessage());
}
break;
case "verify_otp": $otp = $_POST['otp'];
if ($otp == $_SESSION['session_otp']) { unset($_SESSION['session_otp']);
echo json_encode(array("type"=>"success", "message"=>"Your mobile number is verified!"));
}
else
{
echo json_encode(array("type"=>"error", "message"=>"Mobile number verification failed"));
}
break;
}
}
}
$controller = new Controller();
?>

Comments
Post a Comment